MiniTip V: Cutting Technique Part 2 – The Food Processor

TL;DR

Sometimes, you don’t have the energy or desire to cut another damn vegetable with your hands. That’s okay, it doesn’t mean you have to give up. Use a food processor to cut vegetables. Your challenge this week is to use the food processor for something, it could be complex with a lot of ingredients that you put into something else (a fundido sauce) or as simple as a can of garbanzo beans and garlic (garlic hummus).

Intro

Sometimes, you don’t have the energy, desire, or ability to cut another damn vegetable with your hands. That’s okay, it doesn’t mean you have to give up on something delicious. With this technique, you may have to make one cut, but that would be about it.

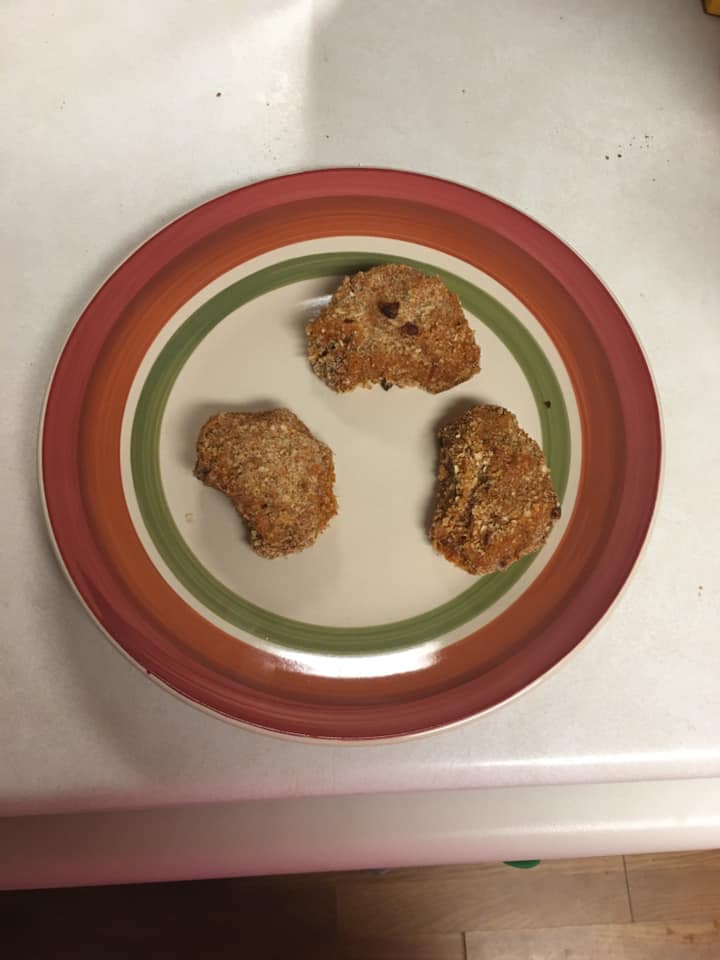
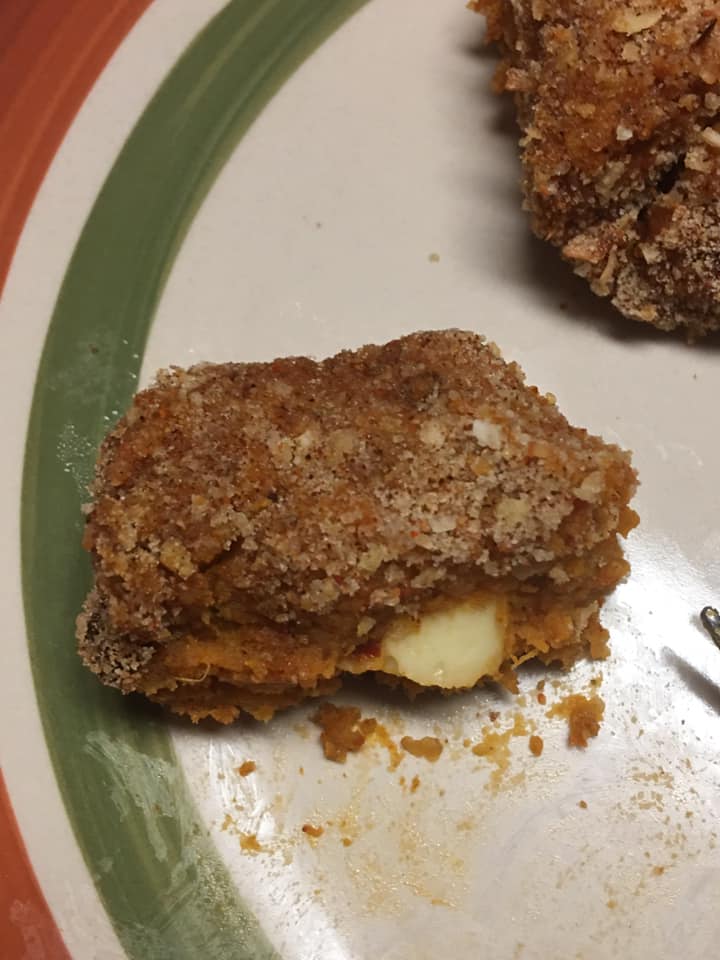
The food processor is an amazing thing. I have a Hamilton Beach food processor that has the usual blades as well as a a grate and slice disc on top. This disc is your go to for chopping things into small pieces. I realized this week that you could totally use the slicing apparatus on the food processor for the complex Schweddy Balls recipe (instead of doing it by hand). Just take out the rotor so only the disc is on the food processor and stick the peeled sweet potatoes onto the disc and let the food processor do the rest. You don’t have to do much.

Food Processor Blades

So, the blades just create it into mulch and, depending on how fast and how process the food, puree (a very liquidy and oily substance, almost like paste) delicious flavor for vegetables like onions). Using the blades is good for salsas (You can put in small tomatoes and vegetables whole, just make sure you only put in a few at a time, you don’t want to overcrowd the processor) or ground chicken from chicken breasts.

The thing to know about food processor blades: it will change the consistency of what you are cooking with, if you like the consistency of onions, don’t put it in a food processor for very long. If you want max flavor, though, form it into a paste, which will coat whatever you are cooking deliciously.

These blades can be taken out for cleaning or if you just want to shred or slice what you are making.

Food Processor Shredding and Slicing

After a very quick perusal of Amazon, every new food processor I looked at now has the slicing and shredding disc(s). So, if you have an old food processor, this part doesn’t apply unless you are in the market for buying another one.

With the brand I have, you can shred vegetables (good for cheeses or hashbrowns) and you can slice (good for slices of cheese as well as potatoes or vegetables to bake or fry as chips). You put the thing you are slicing into the feed tube (the thing that juts up) and just hold it gently, you don’t need to push it down too hard . Your job is to just keep the object against the disc so it can keep cutting.

Culmination

So, say you are making a salsa and you can’t slice the big tomato. You can combine the shredding and blades. You can leave the blades in the food processor and use whichever disc you want and that will slice it into small chunks that will then be blended together into a salsa.

So if you find that you can’t will yourself to cook because you can’t cut vegetables, whether that is because of arthritis or just not enough spoons to stand for very long, try using the food processor.

Bi-Weekly Challenge

So, this week, go forth and try a food processor. If you don’t have one, but a friend does, try using theirs. If it works for you and you like it, think about getting one when you can. If it’s kind of just Meh, then don’t worry about it. There are a bunch of really good recipes that use the food processor, including the Fish Balls recipe that I will be posting on Thursday.

In the coming weeks, I will post a hummus recipe that is super simple (two ingredients) and incredibly flavorful that you can dip your chips into.

MiniTip IV: Cutting Technique Part 1

TL;DR

Find a position that feels the most comfortable while cutting vegetables. If you are in pain while cutting vegetables, you are much more likely to cut yourself. So, if that means sit on a chair, sit on a chair, if that means standing, stand, if that means doing yogic poses, then try, but be very careful while doing them. Sometime this week, cut something that you are about to consume, it might be during a meal or in preparation for a meal.

Intro

When I made the Schweddy Balls several weeks ago, I cut the whole sweet potatoes into cubes. I started by standing, but my anhidrosis started getting really bad.

My Anhidrosis Story (You can skip this section of the post if you want to since this isn’t the tip)

For those of you who don’t know, anhidrosis means that I don’t sweat. They did a Quantitative Sudomotor Axon Reflex Test (QSART), which is a standardized test, meaning they give you a percentile based on how you tested. The best way I understand percentile is that if you are at the 20th percentile of something, then in a room full of 100 people, each representing a percentile, it’s either 79 or 80 that are better than you (21st percentile, 22nd percentile, etc.). I’m not good at math, so that might end up being 79 or 80.

So, back to the QSART test, they put these electrodes on you and put in a gel that stimulates a neurotransmitter called acetylcholine, which usually gives the message to sweat. Then, they attach a hose to suck out all of the sweat that comes out of those electrodes during a 20 minute period. 5 minutes of baseline, 10 minutes of tiny shocks that feel like pin pricks, and then another 5 minutes after that. They suck up all of the sweat.

So they did this on me. The 5th percentile test result for QSART is 5 (that is pretty low, it means that 95 people have higher things than you.). For all parts except for my upper leg, .1 with my upper leg at .4. I didn’t even make it to the 5th percentile. So, that test can tell the doctors several possible things: 1) the neurotransmitter acetycholine isn’t working appropriately, 2) nerves aren’t working appropriately, or 3) the sweat glands aren’t working appropriately. Then, they have to do things after that.

So technically, yes, that means that I do sweat, but it is so minimal that it doesn’t even register as being on the 1st percentile on a standardized test. My doctor told me that I have anhidrosis. In case your curious, they found I have small fiber peripheral neuropathy, which is what they think is causing my anhidrosis. However, the neuropathy isn’t likely to be caused by my diabetes because it has been well controlled since I was first diagnosed.

And Finally: The Tip

Now that that is out of the way, so I was making the Schweddy Balls Recipe trying to stand while cutting up the sweet potatoes when my anhidrosis started acting up. That meant that I was experiencing needle-stabbing pains radiating throughout my back into my shoulders, neck, and forehead. Well, being in pain while holding a sharp knife trying to cut slippery vegetables is not a good idea.

I was cutting them on a pull-out cutting board that our kitchen has, which is a little shorter than counter-height. So, I pulled up the chair I sit on at the table and put it right in front of the kitchen cutting board. I proceeded to cut the vegetables while sitting, I went slow because I was at a different angle than I was used to for cutting, but it worked.

If you don’t have a pullout kitchen cutting board, then try cutting the vegetables on the kitchen table, you should invest in a cutting board so you don’t accidentally cut chunks out of the table and then eat wood in the end. Just know that as you are cutting, take your time, you are not in any rush. On Monday, I’m going to give another tip for cutting that is even easier than this.

Call to Action

Yep, I’m gonna get really direct about this and try and engage with you. That’s what all the marketing things say is important, end it with a call to action. So, here’s your homework assignment, try cutting a vegetable while sitting down sometime this week. Even if it is just one vegetable, like a baby carrot. I’ve found that for me, even just starting with tiny, easy things can help. If, after you cut up the first thing, you want to keep going, try cutting up another.

Send me a comment or picture of you cutting it up and we will celebrate because sometimes with a chronic illness, one minuscule thing (like cutting one single baby carrot) is all that’s all you can do, but you might feel amazing after doing it. It doesn’t have to be pretty. In fact, you could just break a baby carrot in half, that’s a simple way of cutting it if you are worries about cutting yourself.

Tartar Sauce

There is small amount of sugar in this recipe. I haven’t used sugar substitutes for this recipe, but they might work. My relationship with sugar is different than others: If I really want something and it has sugar in it, then I have it in moderation.

In fact, the doctor who diagnosed me with diabetes said that completely cutting out sugar with type 2 diabetes may not the best idea because it may not be sustainable. She recounted how her husband, an avid drinker of a 12 pack of mountain dew cans every day, tried to completely cut it out. After two weeks, he went back to drinking 24 mountain dew cans a day.

My philosophy is essentially this: when you cook for yourself, you know what to expect from your food. You know what you put in it and 1 tablespoon of sugar isn’t all that much compared to store-bought tartar sauce.

That being said, if you need to avoid sugar, you can try using a sugar substitute. I don’t know how it will be.

Ingredients

  • 1/2 cups mayonnaise
  • 1/4 cups sweet pickle relish
  • 1 tablespoons sugar
  • 2 tablespoons miracle whip salad dressing
  • 1/2 dry parsley flakes
  • 1/4 teaspoon onion powder
  1. Combine ingredients and store in air-tight container.

State of the Kitchen Address 2: Arrhging Grr Face

So, my Schweddy Balls recipe was published last week and there were and still are a bunch of technical difficulties.

Because of my energy (or lack thereof on some days), I sometimes need to use different devices to write these posts. Then, I have to switch partway through, go back to change something, or add pictures. Well, last week, I went into my Schweddy Balls recipe to find that there were no ingredients, introduction, and some of the directions were missing. So, I had to rewrite everything. Oh, and did I mention that this was 5 minutes before the post was supposed to be published? So, I reverted it to draft and typed it all again.

Since then, I have come up with some easier ways to do the easier part of the recipe and, low and behold, it’s all gone again. It shows on the website (at least it does for me), but I can’t edit any of it because it apparently doesn’t exist.

So, looking back, there are two possibilities:

  1. In WordPress, you aren’t supposed to write on two different devices. This doesn’t seem likely because so many people probably use several devices to write, but it is possible. In fact, I have done this on my other blog in the past.
  2. When writing, don’t switch from New Block Editor to the Classic Editor because you’ll lose everything for some reason. I think this is more likely the culprit.

If any of you have any idea of how to make sure this doesn’t happen again, please let me know. In the meantime, I will focus on number 2 and not switch between the two. I will either write in the New Block Editor or the Classic Editor. I’m more used to the Classic Editor because I started blogging on WordPress in 2014 and they switched to the New Block Editor right after or around the time that I got sick and didn’t post much anymore. But I do like some of the functions of it. Right now, I’m writing in the Classic because I’m pissed.

Now that the bitching is out of the way, here’s what’s going on this week.

What I have cooked this week

I cooked three things this week in two meals.

I haven’t perfected the first one yet, but the next two were perfect on their first go-around and I will be posting them in the next few weeks. Their names

  • Fundido Sauce over Enchisagna (a several layered enchilada, which basically makes it like an enchilada lasagna)
  • Slow Cooker Taco Cream Corn
  • Korean Fried Spaghetti Noodles (not perfected yet)

Idea for the Blog

I have a few recipes that I know are really good, so I am trying to figure out if I should be posting more than 2 recipes a week. I know that I will run out of the old recipes in a few weeks, which is why I’m kind of concerned about doing that. The thing I’m thinking is keep doing the minitips (because that is helpful to chronic spoonie cooks and new cooks alike), but post a recipe on that day as well to be published at the same time and use the technique that was discussed in the minitip (if applicable). So, if I do a post about dicing onions, I have a recipe that uses diced onions and you can apply the minitip to it. I might switch the recipes sometimes to share recipes that others have created that taste amazing without me having to do anything.

The other option is to just post as I write them, so there will be no schedule. There may be days or weeks in between posts. I don’t think that’s a great idea because I think having a set schedule might be better.

What do you think? Should I publish

  • 2 recipes, 2 minitips, and the State of the Kitchen Address each week or
  • 4 recipes, 2 minitips each week, and the State of the Kitchen Address each week or
  • Publish after I perfect a recipe even if there are other things scheduled for that day?

Recipe: Buffalo Wild Wings or Meatballs

In 2009, I was diagnosed with Celiac Disease (which I was then undiagnosed with a year later) and that meant that I could no longer go to Buffalo Wild Wings (which, to be fair, I had only gone to a few times, but I still loved how the sauce glazed on the chicken). I desperately wanted something like it. As I started cooking more, I saw what would happen to a sauce in the oven. If it was put on meat, it started looking like Buffalo Wild Wings.

Therefore, I decided to try something, my mom had some frozen gluten free chicken nuggets and I got some of the BBQ sauce we were using and threw the BBQ sauce onto the chicken nuggets and then put them into the oven. Within 10 minutes, there was an amazing smell coming out of the oven. I kept them in there for another 10 minutes, and thus, Buffalo Wild Wings were created.

With this recipe, you can use pretty much any kind of meat you want. If you are doing meatballs, you can Buffalo Wild Wing them. Yes, that is right, I just made Buffalo Wild Wing into a verb because I can. Here’s how you do that.

There are two different times depending on whether you use thawed or frozen meatballs/nuggets/tenders. There is also a simplified vs. complex one where the difference is rolling the meat in the BBQ sauce vs. just pouring a bit on top of the meat.

A note on Sugar Free BBQ Sauce: If you use sugar free BBQ sauce, you need to know that it won’t glaze onto the meat. It will still taste amazing, but it won’t look glossy or feel sticky on the meat. This is because sugar melts into a caramel thickness that becomes sticky.

Recipe

Ingredients

  • Frozen, thawed, or just-out-of-the-oven cooked meatballs or chicken nuggets/tenders
  • A bunch of BBQ sauce of your choice

Directions Complex

  1. If using uncooked chicken nuggets/tenders/meatballs, cook them according to the instructions on the package. Take out.
  2. Set the oven to 350°
  3. Pour the BBQ sauce into a small bowl (a cereal bowl works) and throw one piece of meat into the sauce, making sure to coat it completely in BBQ sauce.
  4. Place the meat onto a baking sheet.
  5. Follow steps 3 & 4 until all of the meat is coated.
  6. Place the baking sheet into the oven and cook for 20 minutes (if frozen) or 10 minutes (if thawed)

Directions Simple

  1. If using uncooked chicken nuggets/tenders/meatballs, cook them according to the instructions on the package. Take out.
  2. Set the oven to 350°
  3. Pour about a tablespoon of BBQ sauce on top of each meatball, more or less just to coat the top of it.
  4. Place the baking sheet into the oven and cook for 20 minutes (if frozen) or 10 minutes (if thawed)

Cooking MiniTip III

Checklists are your friend

I don’t use paper copies of recipes. I need to use my phone for recipes because it is easier for me. I can bring it with me as I move around and it isn’t bulky like a book.

The main reason I use my phone for recipes is I can use checklists for recipes. Once you have had a recipe that called for a teaspoon of cayenne and you accidentally put a quarter of a cup, you know you need to do something different. I was so disheartened from that that I didn’t try cooking again for several more months when I figured this trick/hack/accommodation.

In my iPhone’s notes app (all phones have an app like this, you can also use Evernote), I would type in the ingredients in a list. Then, I highlighted the list and turned it into checkboxes that I could check as I put in the ingredient. No more 1/4 cup cayenne pepper.

That is what I was using. I have since bought an app called Paprika, which does this for you. You just find a digital recipe and it rips the ingredients and directions for you. You can check off ingredients as you put them in.

I’m probably going to go into greater depth of paprika in the future because it has a lot of things that help me out when brain fog is bad. It’s $4.99 on mobile devices (iPhone and iPad are now combined, so you don’t have to pay for both) and $29.99 for PC and Mac. I don’t make any money off telling you about this app, I just want to share it with you because it has helped me out a lot.

Cooking MiniTip II

Wear comfortable footwear

When you are cooking something where you have to stand some, whether that be over the stove or the bowl is too tall to mix at the kitchen table, wear comfortable footwear.

I don’t say shoes because you may find sandals or barefoot is most comfortable for you. I guess barefoot isn’t really a footwear, but if that’s the most comfortable thing for standing, then do it.

I put on my shoes, which have some dr Schulz inserts because I have found that standing for any period of time longer than it takes to say a Hail Mary (not sure why that was the first thing that came to my head. What can I say, I used to be a Catholic) can become agony on my feet. They just ache as if baby screaming bloody murder. But with the shoes on, they are like a slapping baby (I was going to correct that to what I actually typed before autocorrect, which was sleeping, but a slapping baby is kinda hilarious. Is the baby slapping? Like the dinosaur baby from Dinosaurs.).

So wear some comfortable shoes.

Recipe: Schweddy Balls

Here is the recipe you have all been waiting for. So, the name may not sound appetizing, but they taste amazing. This is a stuffed sweet potato taco ball recipe.Before the recipe, here’s the SNL sketch that gives this recipe its namesake. 

I’m breaking this up into two different versions. The simple recipe uses canned sweet potatoes. This is a good idea for those who don’t have the time or spoons (energy) to make the mashed potatoes from scratch. 

Some of you may be uncomfortable or find that it is cheaper to buy and mash the sweet potatoes on their own.

A note on replacements: The sweet nature of sweet potatoes goes really well with this recipe because it adds a bit of sweetness to the spiciness of the taco seasoning. That being said, I haven’t tried this recipe with regular potatoes, so it might not be as good with regular potatoes.

Schweddy Balls 2

Simple Recipe

Ingredients

2 cups canned sweet potatoes
1 egg, lightly beaten
4 tablespoons butter, melted, divided
1 tablespoon heavy whipping cream
1/2 teaspoon salt
¼ cup taco seasoning
1-1/2 cups crushed gluten free cereal
Several string cheese cut into cubes

Directions

  1. Empty and drain the sweet potatoes.
  2. Mash the sweet potatoes.
  3. Mix together the sweet potatoes, egg, 2 tablespoons butter, cream, taco seasoning and salt.
  4. Make a ball with a large spoonful of the mixture.
  5. Gently push the string cheese cubes into the meat and continue rolling around in your hand.
  6. Roll each ball in the cornflakes.
  7. Place on greased baking tray.
  8. Bake 400° for 45 minutes.

 Complex Recipe

Ingredients

4 sweet potatoes
1 egg, lightly beaten
4 tablespoons butter, melted, divided
1 tablespoon heavy whipping cream
1/2 teaspoon salt
¼ cup taco seasoning
1-1/2 cups crushed gluten free cereal
Several string cheese cut into cubes

Directions

  1. Peel and cube sweet potatoes. Put in a pot of salted water and bring to boil. Cook for 20-30 minutes or until the sweet potatoes are soft enough to easily push a fork through.
  2. Drain the water out and put the potatoes back into the pot. Mash it down. Put it in the fridge to cool for 20 minutes.
  3. Mix together the sweet potatoes, egg, 2 tablespoons butter, cream, taco seasoning and salt.
  4. Make a ball with a large spoonful of the mixture.
  5. Gently push the string cheese cubes into the meat and continue rolling around in your hand.
  6. Roll each ball in the cornflakes.
  7. Place on greased baking tray.
  8. Bake 400° for 45 minutes.

State of the Kitchen Address 1

So, my plan is that on Wednesdays, I will write a sort of state of the union type of address. In these posts, I will just write from the top, bottom, and diagonal of my head. This means it will sometimes be about my health, like doctors I have visited and what they have said or ordered, and sometimes it will be about my philosophy on cooking and how and why I enjoy it.

It’s essentially going to just be a “How are you doing this week, Sam?” So, feel free to skip it if you want to. I don’t know if it will have anything to do with cooking or food, but it might. I might try to, I also might just write about what I’m feeling at that time.

Worries and Solutions

I have a lot of insecurities regarding this blog. I just don”t know if or how long I can keep up with this blog. I am wanting to keep up with this blog constantly, but I know that it is definitely a possibility that it will fall to the wayside if I get worse again. Worse for me is that brain fog creeps in and begins to strangle my ability to word, think, or put my thinking into words.

But I’m still going to do it because it’s important because I love cooking and it’s a really calming activity.

So, bear (I just had to search whether it was bear or bare, it’s apparently bear) with me as I try to be patient with myself.

Cooking I did this Week

On Saturday, I made Barbie’s Tuna Salad, a recipe I found on Allrecipes. It tasted absolutely amazing. My mom said that she wouldn’t like it because there was curry powder in it, but once I made it, she couldn’t get enough of it.

I struggled with the consistency of the sweet pickle relish. I can’t handle squeaky foods, which are foods where you bite into them and they squeak. And by can’t handle, I start dry heaving unless I take all of my willpower to not dry heave. Dry heaving and trying to not dry heave are not fun things to experience.

However, I have found for texture issues. If I have the squeaky thing with something crispy, like a cracker or toasted bread, then my brain can get past the consistency issue. The crispy or crunchy distracts my brain enough. Because I love the flavor of sweet pickle relish, just not the consistency.

So, on Sunday, my mom used the leftover Barbie’s Tuna Salad and made tuna melts out of it. Yeah, my mom did that. I was sleeping for most of the afternoon on Sunday…and today as well (about 18 hours of sleep because of several days of insomnia). I’m not able to cook that many meals each week, not as many as I would like.

And it makes it even more difficult that my sleep schedule is all sorts of insanity. One week, I’m sleeping at night from 3am to 11am, the next, I’m sleeping from 3pm to 11pm. Week to week and day to day, my sleep schedule completely changes.

I’m probably going to add Barbie’s Tuna Salad recipe to another thing to make something. I’m thinking cold spaghetti (cooked spaghetti that is then rinsed with cold water to make it cold) and this. I’m also going to add a step where you take the sweet pickle relish and ground it with a mortar and pestle because I want to try this on or in something that isn’t crispy (I do this when I use onions in recipes. By grounding it down, the onion releases all of its amazing oils which makes the dish even tastier.)

Health Update

I went to see my eye doctor yesterday and she found that my corneas don’t have inflammation anymore. But because it was most likely caused by dry eyes, if I stopped taking Restasis (the eye drops I’m taking), the cornea would probably become inflamed again.

Before I started taking Restasis, I was severely sensitive to light. I needed to wear dark tinted glasses all the time. Whenever I tried to put on my regular glasses (clear, non-tinted), I got a migraine within 20 minutes that would last until about 3-4 hours after putting on the tinted glasses again. Within 3 weeks of starting Restasis, I was able to wear clear glasses without any migraines. I’m still sensitive to certain lights, most notably the obviously created in the pits of hell fluorescents. But I wear a hat for situations where I have to be underneath them and it helps to an extent, a mild headache still shows up at those times, but it goes away once I’m out of that light within an hour or two.

Conclusion

So, there we are. I’m nervous about not being able to keep up with this blog, but screw it because I’m going to do it anyway, allowing myself to miss days if I have to.

The schedule I’m wanting to go with for this blog is this.

Mondays: Mini-tip
Tuesdays: Recipe
Wednesdays: State of the Kitchen
Thursdays: Recipe
Fridays: Mini-tip

Minty Box Brownies

Ingredients

  • Box of brownies.
  • 1/2 teaspoon mint extract or 1/4 cup crushed mints or candy canes
  • Frosting
  • 1/2 teaspoon mint extract or 1/4 cup crushed mints or candy canes.

Directions

  1. In a medium-sized bowl, put in the ingredients for the brownie mix according to the box.
  2. Put in the peppermint extract or crushed.
  3. Combine the ingredients
  4. Bake as directed on the box.
  5. Crush up the mints you are using for the frosting in either a food processor, in a baggie with a rolling pin, or a mortar and pestle until it forms a powder.
  6. Mix the crushed mint powder or peppermint extract into the frosting.
  7. Once the brownies are cool, spread the mint frosting over them.
Design a site like this with WordPress.com
Get started